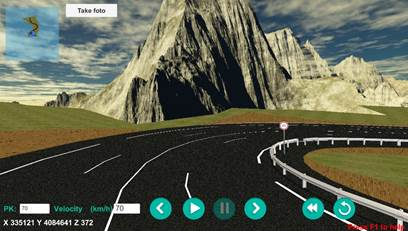
In this mode you can do an automatic tour (previously defined from the DTM Road Route command), where you can see at all times coordinates X, Y, Z and the Station, we can change it and go directly to that station, where the initial speed that will be that entered using the MDT command. However the speed can be changed at any time during the tour by pressing the Q key to increase it and the Z key to reduce it, and a button bar is available to control the route:
 allows you to go back to the last station
 allows you to go forward to the next station
 starts the automatic tour
 lets you stop the tour
 starts the tour again from the beginning
 starts the tour in the opposite direction form the other end of the route
Moreover, we can move the mouse during the tour to change the point of viewpoint to the left, right, up or down.
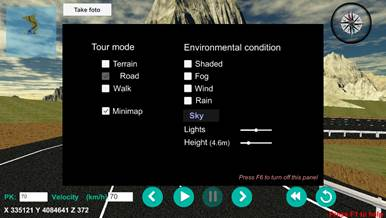
In this mode, if you press F6, it shows the following dialogue box:
Route mode, from here you can switch to any of the other two modes
Environmental conditions, lets you add effects to the scene, to increase the sense of realism:
Shading, adds shadows to the scene
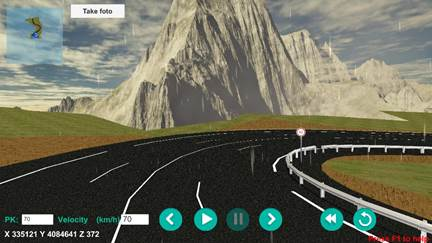
Fog, adds fog effects to the scene
Wind, adds wind effects to the scene, which will be more noticeable where trees are present
Rain, adds rain effects to the scene
Sky, lets you change the sky, between cloudy, sunny or night
Lighting, increases or decreases the amount of light in the scene
Height, lets you modify the height of the observer
The table provides a summary of the keys used in this mode:
|
Road Mode Help
|
|
|
Hold down the Q key
|
Increase travel speed
|
|
Hold down the Z key
|
Reduce travel speed
|
|
Mouse movements
|
Change the viewing angle in all directions
|
|
F6 key
|
Access to path mode, terrain mode and different settings options
|
|
F2 key
|
Insert random 3D objects
|