In this mode you have an overview of the terrain, and you can rotate, zoom and select objects with the mouse. The table below provides a summary of the different keys and mouse movements we may need to move through this mode:
|
Terrain Mode Help
|
|
|
Left click + the T key
|
Select any part of the terrain to go to Path Mode
|
|
Click on the F2 key
|
Insert random 3D objects
|
|
Click on the F3 key
|
Insert specific 3D objects
|
|
Click on the middle button
|
To select turn point and turn
|
|
Left click + up and down movement
|
Dynamic zoom
|
|
Right click + movement
|
Movement in all directions
|
|
Mouse wheel
|
Dynamic zoom
|
|
Hold the D key down and mark start and end with the mouse
|
Measure 2D, 3D distance, height and slope difference
|
|
3D Objects Help
|
|
|
Left click on the object
|
Select the object
|
|
Hold down the Left shift key + left click
|
Multiple selection with selection square
|
|
Hold down the Left shift key + W
|
Move the object
|
|
Hold down the Left shift key + E
|
Rotate the object
|
|
Hold down the Left shift key + R
|
Scale the object
|
|
Click on the F5 key
|
Finish insertion of specific objects
|
Clicking on the F1 key in this application at any time will display these tips.
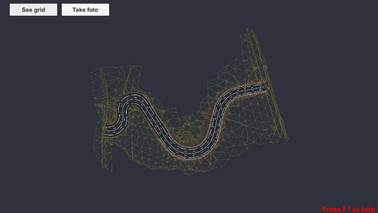
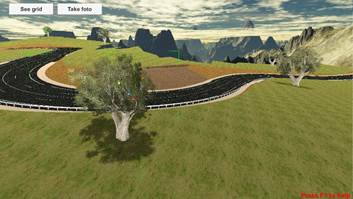
The options in this mode include the See mesh button, which enables us to see the wire model of the terrain, and the Take photo button, which enables us to take a screenshot and save it under the name you choose.
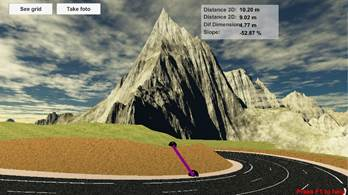
It also allows us to measure distances by placing the mouse where the measurement is due to start, pressing the D key and moving the mouse towards the end of the measurement. On releasing the D key, a table will appear on the screen with the 3D distance, 2D distance, the differences in height and slope as a percentage.
In this mode you can go to the Path mode, for this you click on any point of the terrain and press the T on your keyboard.
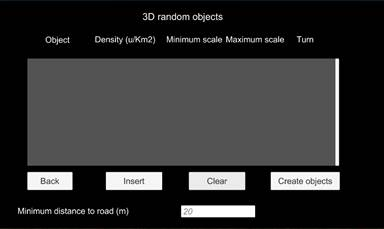
You can also insert and edit both point objects and random objects. If you press F2, it shows you the dialogue box to Insert random 3D objects.
Object, name of the 3D object to be inserted
Density, number of objects per km2 to be inserted
Minimum Scale, minimum scale of the 3D object
Maximum Scale, maximum scale of the 3D object
Turn, rotation angle in degrees of the 3D object
Back, allows you to return to the terrain view, as does pressing the F2 key again
Insert, displays a dialogue box with the available 3D objects to insert
Delete, deletes the 3D objects from the list
Create objects, once all the 3D objects to be inserted have been selected, press this button to add them to the terrain
Minimum distance to the road, when there is a road in the terrain, it has been envisaged that the 3D objects do not fall on said road but are at least at the established distance.
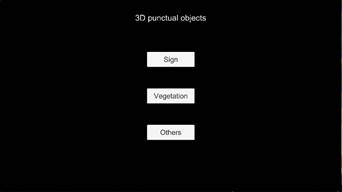
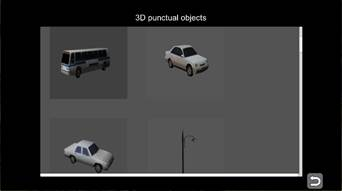
If you press F3, it shows a dialogue box with the 3D objects available to insert individually and is grouped into three categories, Signage, Vegetation and Other:
To insert these objects in the terrain, just select any of them, and immediately the view is shown again in Terrain mode, and you can take the 3D object to the desired position, We can continue to insert the selected object in different places until we press the F5 key.
To edit the 3D objects inserted both individually and at random, left click the object with your mouse or to select multiple objects with the left mouse button and hold down the LeftShift key to select multiple objects. When editing we need to hold down the Left Shift key and move using the left mouse button. In this way we can scale (R key), rotate (E key) and move (W key) the selected objects.
Changes made to 3D objects will not be stored, so they will only be valid for the current display.