3.15. Registering point clouds
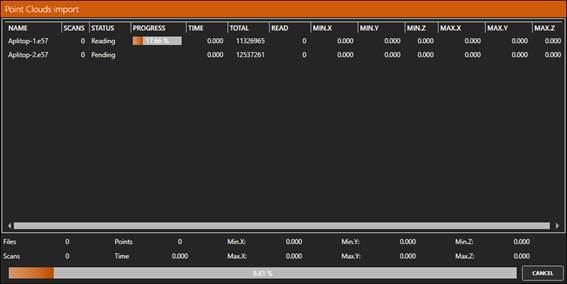
1. Create a new Registry.pce project and import the Aplitop-1.e57 and Aplitop-2.e57 point clouds from the 2-SCANNER folder, without checking the box to unify point clouds and scans.
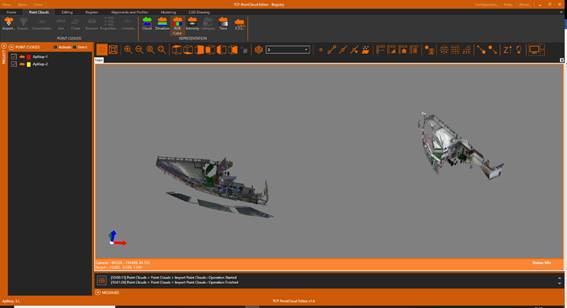
2. Verify that these are two scanning sessions of the same building but in different coordinate systems.
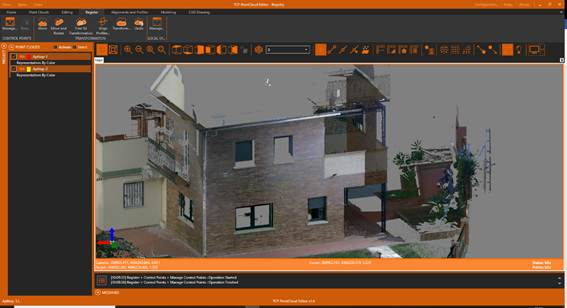
3. Hide the Aplitop-2 cloud and zoom in on. Rotate the scene to get a view similar to the following image.
4. Turn on the Point Reference. Press the Point Properties button, selecting the two points approximately where are the red dots shown in the following image. It can be zoomed in if necessary.
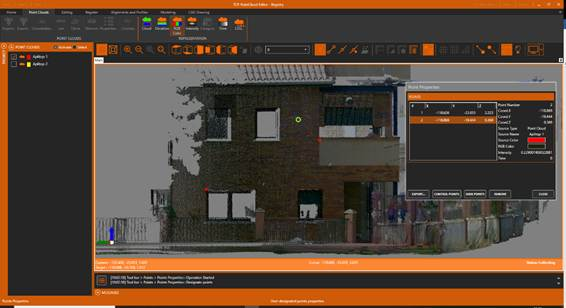
5. In the Point Properties dialog, click the CONTROL POINTS button to convert the selected points to control points. We note that the symbology of these points has changed.

6. In addition, we're going to export the coordinates of these points to a file that we'll use later. To do this click the EXPORT button and specify as name Aplitop-Local.pun. Press CLOSE.
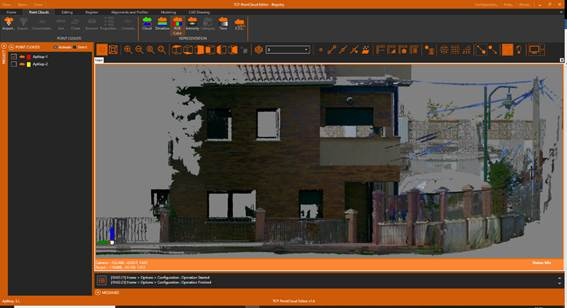
7. Hide the Aplitop-1 cloud and make Aplitop-2 visible. Zoom in and look for the same area approximately, so that you can see the façade with the windows and the terrace.

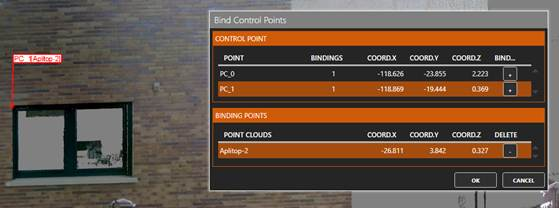
8. Activate the Register ribbon and within the CONTROL POINTS group click Bind. In the dialog, select PC_0 and press the + button to designate the same point above the cloud.
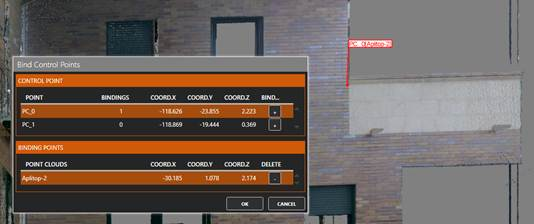
9. Repeat the same process with the point PC_1 and press OK.
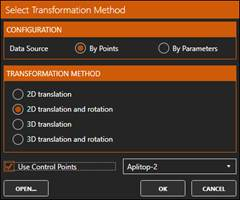
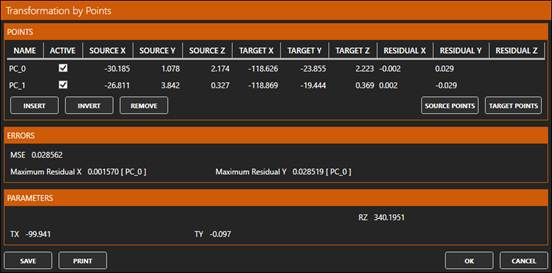
10. Now we proceed to perform the coordinate transformation, using the control points. To do this, on the Register ribbon and in the TRANSFORMATION group click Transform. Select 2D Translation and Rotation as TRANSFORMATION METHOD, activate the Use Control Points option and press OK.
11. The following is the report of the transformation.
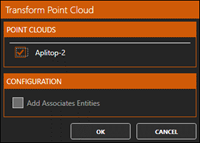
12. Press OK and select the Aplitop-2 cloud to apply the transformation. Press OK to proceed with the calculation.
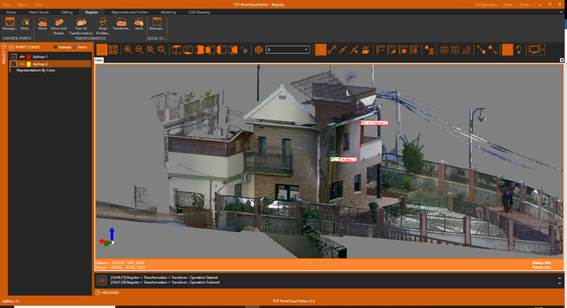
13. In the table of contents, activate the two clouds. Zoom in and check that the two clouds have aligned.
14. Finally, we'll bring the point cloud to global coordinates. To do this, we run the Move and Rotate tool. In this case, we will use press the IMPORT button corresponding to the Source and choose Aplitop-Local.pun that we have saved before. For the Target press the corresponding IMPORT button and choose the file Aplitop-Global.pun, located in the 2-SCANNER folder.
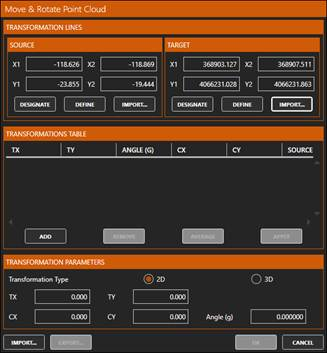
15. Press the ADD button to fill the TRANSFORMATION TABLE and select the single row.
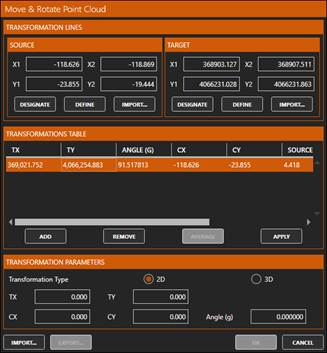
16. Now click the APPLY button to fill in the TRANSFORMATION PARAMETERS.
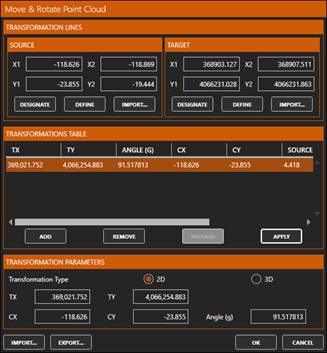
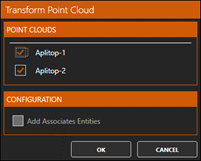
17. Press OK and select the Aplitop-1 and Aplitop-2 clouds to apply the transformation.
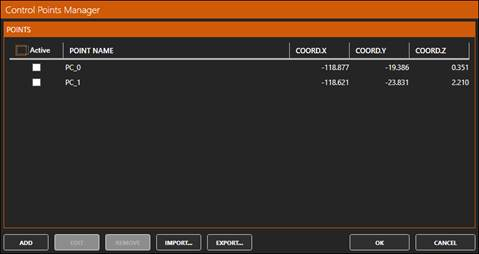
18. In the CONTROL POINTS group, click the MANAGE button and clear the Active check box so that they do not interfere with the display. Press OK.
19. Zoom in and check that the cursor coordinates show UTM coordinates.