2.4. Importing a folder
1. Now we will create a new project to which we will add several point clouds. To do this, on the Home ribbon and within the PROJECT group we click the New icon recording the current project. Give Sierra.pce as file name in the corresponding project folder.
2. Next, we will import a series of LiDAR files from the National Plan of Aerial Orthophotographs (PNOA) loaned by © National Geographic Institute of Spain. To do this, activate the Point Clouds ribbon and within the POINT CLOUDS group click the Import icon . Select the Unify point clouds and scans check box. Press the FOLDER button and select the Las(LAS/LAZ) LiDAR file format and then press OK.
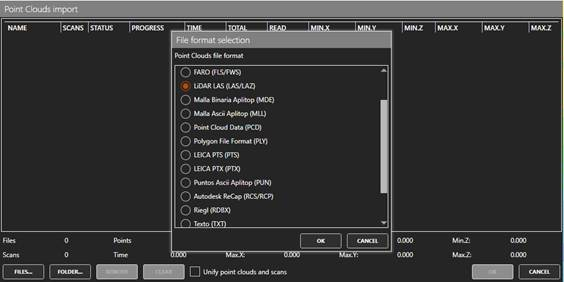
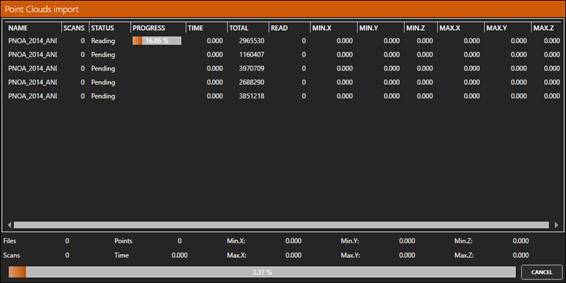
3. Select the C:\Tcp PointCloud Editor Projects\1-LIDAR\PNOA folder and press OK to start the import process for all the files in the folder.
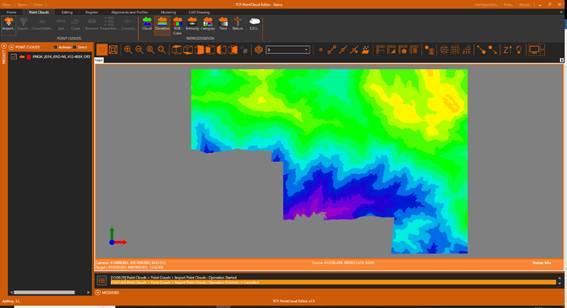
4. Initially, the point cloud will be displayed with representation by elevation. In the REPRESENTATION group, click the RGB Color icon to change the symbology to natural color.
5. Within the POINT CLOUDS group, click the Properties button. Check that the clouds have color, intensity and category.
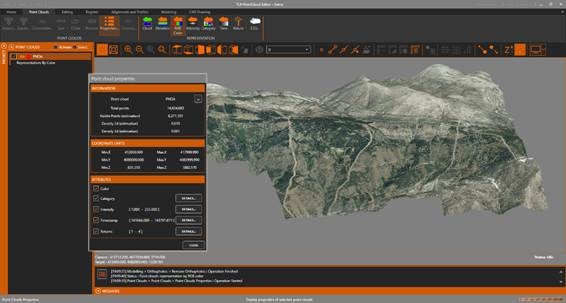
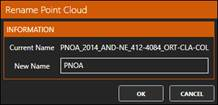
6. Click on the button ... to the right of the file name to set a new name to the cloud: PNOA and press OK.