9.18.3. Long Sections Panel
On the left side of the screen, the data from the current in edition profiles will be shown. Additionally, certain operations over the profiles could be accessed from this panel.


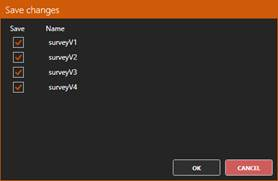
When the application closes, all profiles must close. The following dialog will be shown to confirm the saving of the changes done to the listed profiles (modifying the original files), we could also cancel closure.
Vertices list:
For each profile’s vertex, we’ll have a line in the list like this one:
The items, from left to right, are:
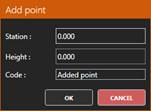
· Station: The vertex’s Station. We can double click it to write a new Station for the vertex. The list will be reordered by station after the change. If we attempt to set two vertices at the same Station, the application will show an error message and no changes will be performed, because a long section does not support definition of two heights at the same station.
· Height: The vertex’s height. We can double click it to write a new height for the vertex.
· Code: The vertex’s code. We can double click it to write a new code for the vertex.
·  Remove: Removes the vertex. It’s also possible to remove the vertex by selecting the list’s row and pressing the delete key.
If a list row is selected, the vertex will be highlighted on the CAD view.
If we enable the Dynamic Points option in the application’s Settings, the list will only show the vertices visible in the CAD view.
Long section’s tools:
At the bottom right side of the panel, we can find specific long sections edition tools:
In edition profiles:
At the bottom of the panel we can see the name of the profiles that are currently in edition:
The highlighted one is the active profile. We can set a profile as active: by clicking its name in the panel, by clicking the profile’s polyline in the CAD view, stablishing its layer (the layer with the name of the profile) as the current layer.