18.13.2.1. Projection
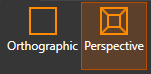
With these operations we can control the projection mode of the camera.
 Sets the current projection to orthographic.
 Sets the current projection to perspective.
View

With these tools we can control the position/orientation of the camera.
 When using the Position tool, this value defines how far above the ground the camera should be located. That is, the final position of the camera will have the height of the first point designated in Position plus the value entered in this field.
Orient the view so that the camera looks towards the indicated orthogonal plane.
Zoom
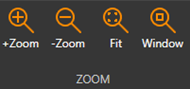
With these tools we can control the zoom level.
 Allows you to designate a region of the screen and center the view on it..
Mode
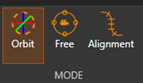
In this menu we can select the way to control the camera.
 In this mode, the camera moves relative to a target point.
The target point will be highlighted in yellow when the camera is moving.
Controls:
· Left Click: While pressed, moving the mouse orbits the camera around the target. This movement can also be done with the keyboard cursors.
· Right Click: While pressed, moving the mouse moves the camera closer/farther from the target (it can also be done with PageUp/PageDown).
· Mouse wheel: If it is kept pressed, moving the mouse controls the horizontal/vertical position of the camera, “panning” (it can also be done with the numeric pad cursors: 8,4,6,2). The movement of the wheel increases/decreases the zoom level.
· Double Click: Sets the clicked coordinates as the camera target (there must be something other than the background at the designated point).
 In this mode the camera moves freely, without relation to a target point.
Controls:
· WASD (or cursors): WS (or cursor up/down) move the camera forward or backward. AD (or cursor left/right) move the camera left or right. These directions are relative to the direction you are facing.
· Hold any mouse button: Moving the mouse changes its orientation.
· Mouse Wheel: Controls the zoom level.
 In this mode the camera moves relative to an alignment (only activated if invoked from Road Tour).
In this mode, a floating window appears that allows us to control the view numerically. We can exit the tour simply by closing this window:

 and
and Actual Station.
 Height of the camera with respect to the elevation of the grade.
 XY distance from camera to aligment.
 The horizontal orientation of the camera is always increased by this azimuth.
 The vertical orientation of the camera always increases this angle.
Controls:
· Left Click: While pressed, moving the mouse changes the azimuth and tilt (orients the camera)
· Right Click: While pressed, moving the mouse increases/decreases the current station.
· Mouse Wheel: If held down, moving the mouse controls the horizontal/vertical position of the camera (Height and Distance). The movement of the wheel increases/decreases the height.
· WASD (or cursors): WS (cursor up/down) increment/decrement the current station. AD (cursor left/right) increase/decrease the offset.